Showing posts with label homemade. Show all posts

Wednesday, August 26, 2015

Day three of Pulled Pork???

I slowed cooked a pork roast the other morning, and it was smelling all delicious like allll day long.

Dinner time came and went and I still had soo much pulled pork left over. The hunni was warned he would be having some in his lunch  and the girls and I would be doing the same, lol.

Day 2 of lefts over not so bad but still sooo much left......

Day 3 I felt like having pizza for dinner. I started getting everything out, hunni brought some cheese home and then I wondered about BBQ pork pizza????

Lets just say there's no more left overs and it was sooooo yummy. I also made a pepperoni pizza for the girls just in case, well they polished that one off and then went for the BBQ pizza.

Happy mama moment!


Super easy too, make your own pizza dough I really like the pioneer womens  recipe it is SUPER easy, or do store bought.  

BBQ sauce, pork, little more sauce and top with cheese ( mozzarella and cheddar ) and in the oven for about 20-30 minutes and about 350 degrees. 

Saturday, February 16, 2013

Happy Birthday Love :)

I'll just start with hes really hard to buy for and for the last 5 birthday. So this year I thought I would try something alittle different, then just the same ole thing he gets EVERY year. :)

I made a beer cake! I added his favorite candies, some belts, and of course a 30 pack :) Not his favorite kind ( hes a Newcastle man) but he loved it. So here it is.......

Saturday, February 9, 2013

Bird feeders :)

So the other day I decided that the girls, Dar, and I were going to make some pine cone bird feeders. Lets just say they turned out great and the girls had a blast making them!

They really didn't take to long, I mean the hard/messy part was just covering them in peanut butter. I always save a few coffee cans so that was easy. I put a little bird seed, well in our chase some chicken scratch which i refer to as "chicken crack" they go crazy when I bring that stuff out. Anyways I poured some into the coffee can and place the peanut butter covered pine cone in and then let the girls shake to there little hearts desires. All in all we had a bunch of fun.

Though I warned the girls it might take a couple days for the birds to find it. Well the day they finally did, I had about 20 little birds all over our deck. It was a nice site and the girls watched for ever!

The collected targets :)

Dalila working hard.

Chloe getting it done.

The finished products

All ready for the birdies

One of our visitors :)

Thanks for reading, follow me :)

Thursday, January 31, 2013

New habits

So beginning around summer of 2012, I decided that I was just going to STOP using my dryer. I kept telling my other half that the day I got a clothes line........ I kept wishing and looking for plans and realized it wasn't going to happen anytime soon. So one day I just packed up the girls went to our local True Value, and bought some 100lb clothes line. Ran it from our deck to a tree and there we go. That's it until the day I build a pretty one. lol

Ill tell you what though,I was the person I wont lie that washed and dried the laundry but it would just sit there in laundry baskets til who knows when. The minute after I tied up my clothes line I ran inside and started to do laundry. So excited that when the ding went off on the washer, I ran out to hang it all. Realizing in half the time of the dryer it was dry from just blowing and basking in the sun for less than an hour. As I'm taking it down I'm "folding it", realizing I just did the "hard part" of laundry I walked inside and immediately put it all away!

I killed to birds with one stone!
1. Saved money by not using my dryer
2. Laundry is folded and not just sitting in the basket, waiting to be folded

All in all I think this was a good day. Not to mention our power bill went down my almost $40 a month.

Some other things that I have been doing, is making my own laundry detergent and Spray-n-wash. I used to spend about $40-$60 every 2-3 months on Tide, Dreft (*for the girls) and , Spray-n-wash. I NOW spend close to about $1.00 a month just by making it with things that everyone has around there house.

The initial cost of buying the washing soda and borax was about $12.00 depending on were you go, but it should last you years ( if you only use it for making laundry detergent). So in the long run if I look at the date I bought it and it last me 5 years then I'll be spending about .20 cents a month to wash my laundry. SCORE!!!

Friday, January 11, 2013

Cinnamon Rolls

OK so I made a mass amount of Cinnamon Rolls, which I did on purpose. I wanted to see how well they would freeze and then be reheated. I have to say they did well. I wouldn't want to keep them frozen for more than 3 months. That's just me though. So anyways here you go:


Dry ingredients


Milk, butter, sugar, and salt


Add egg to dry ingredients


Mixed together :)
 ***Somewhere along the line I forgot to take pictures of rolling it out and adding the filling  to it, OOPS!

Roll her up


Cut into equal quarters, about a half inch I would say.

Yummy


Prep: 45 Minutes
Rise: 1 hour and 30 minutes
Rest: 10 minutes
Bake: 20 minutes
Oven: 375 degrees
Makes 24 rolls
 
4 to 41/2 cups all purpose flour
1package active dry yeast
1 cup milk
1/3 cup granulated sugar
1/3 cup butter or margarine
1/2 teaspoon salt
2 eggs
3/4 cup packed brown sugar
1/4 cup all-purpose flour
1 Tbsp ground cinnamon
1/3 cup butter or margarine

  1. In a large mixing bowl combined 2 cups of the flour and the yeast; set aside. In a small saucepan heat and stir milk, granulated sugar, and 1/3 cup butter, and salt just until warm (120 - 130 degrees) and butter almost melts; add to flour mixture along with eggs. Beat with an electric mixture on low to medium speed for 30 seconds, scraping bowl. Beat on high speed for 3 minutes. Using a wooden spoon, stir in as much of the remaining 2-21/2 cups of flour as you can.
  2. Turn dough out onto a floured surface. Knead in enough remaining four to make a moderately soft dough that is smooth and elastic (3-5 minutes). Shape dough into a ball. Place dough in a lightly greased bowl, turn once to grease ball. Cover and let rise in a warm place until doubled in size (1 -11/2 hours).
  3. Punch dough down. Turn onto a lightly floured surface. Divide in half. Cover and let rest 10 minutes. Lightly grease two baking pans; set aside. For filling, stir together brown sugar, 1/4 cup flour, and cinnamon; using a pastry blender or fork, cut in 1/3 cup butter until mixture resembles coarse crumbs.
  4. Roll each dough half into a 12x8 inch rectangle. Sprinkle filling over dough, leaving 1 inch unfilled along one of the long sides. Roll up each rectangle, starting from the filled long side. Pinch dough to seal seams. Slice each rolled rectangle into 12 equal pieces. Arrange in prepared pans. Cover and let rise in a warm place until nearly doubled in size (30 minutes).
  5. Preheat oven to 375F. Bake for 20 to 25 minutes or until golden. Cool about 5 minutes; remove from pans. Enjoy!
*Better Homes and Gardens New Cook Book

Thank you!

Follow me, like me, leave me a comment :)

NO spend January.... FAIL

It is just not our month to try and do this, before I knew it January was here. I didn't even get a chance to set some rules up for us. To be honest we have to much stuff to buy this month and probably the next few months. I WILL be doing a no spend month just not sure what month.

Between having to buy seeds for this years garden, and preparing for the addition of goats to our family. I have to build them a run and house, buying lots of fencing which that's really a chunk of money I will forking out. I really have lots of left overs (wood wise) from my chicken coop build .

So other than that I just wanted to write this, to let you know I didn't forget. I just couldn't do it! FAIL F- :(

 However I am still doing the Urban Farm Book Challenge . Which I am preparing for all this month, and will be starting in February. So check back often for updates! Reclaiming my life one day at a time. The less I have to give away, and the more I learn about where my food comes from makes me a happy camper. I also don't feel guilty about what I'm feeding my family. :) MAJOR +

So please like my page, follow me, leave a comment I would love to hear feed back, also let me know what you want to know. Ill give it a try!  Thanks.

Sunday, December 9, 2012

Smokey Cheese Ball

This was soooo easy to make. It was the hit of the party I took it too, and I will be making it again to go with Christmas dinner. I completely forgot to take a picture of the finished ball. I thought about taking a picture of what was left but there wasn't really anything left. :) I will upload a picture when I make it here in a couple weeks. I will warn you you see those little cheese balls in the store that are like 1 cup max. This makes 3-4 cup cheese ball its massive!

I like being crazy so I mixed two different cheeses together, you could do one by all means. Change it for your taste. Or throw a little of all types in it. I used Smoked Gouda and Sharp Cheddar along with the rest of the recipe. It smelled soo amazing also. Highly recommended.

Prep: 15 minutes
Chill: 4 to 24 hours
Stand: 45 minutes
Makes: 3 1/2 cups

2- 8 ounces packages cream cheese
2 cups finely shredded smoked cheddar, Swiss, or Gouda cheese
1/2 cup butter or margarine
2 tablespoons milk
2 teaspoons steak sauce ( I used A1)
1 cup finely chopped nuts, toasted. ( I didn't toast mine, I just bought some chopped nuts ( hazelnuts , because the Mr. grabbed the wrong kind still yummy though)

1. In a mixing bowl let cream cheese, shredded cheese, and butter stand at room temperature for 30 minutes. Add milk and steak sauce, beat until fluffy. Cover and chill for 4 to 24 hours.

2. Shape mixture into a ball, roll in nuts. Lets stand for 15 minutes. Serve with crackers.

Saturday, November 3, 2012

Apple pie!!! oh my!!

Had a hankering for some apple pie the other day. So I made some, everything from scratch. It was SO yummy. Just wanted to share so picture with y'all. I guess  wanted to eat it so badly that I forgot to take a finished picture, oops!


Published with Blogger-droid v2.0.8

Wednesday, October 17, 2012

Ball Itailian Sauce Reg

We really enjoy this one. It has a taste that I cant really describe. The first time I made it, it didn't thicken very well so it was a somewhat runny sauce. Though when we added it to our spaghetti it really grab on with a great flavor. I have since then made more and I added a small can of tomato paste to it while it was cooking. That seemed to thicken it up quite a bit. But all in all, this will be a staple in our household. Next year I'm going to try my daddios favorite spaghetti sauce that he makes every year. :) Enjoy~~!


Found at http://www.freshpreserving.com/recipe.aspx?r=314


You will need:

For every 2 pints of pasta sauce: 4 lbs fresh tomatoes (about 12 medium) 
OR
1 can (28 oz) crushed tomatoes + 1/2 cup water
1/3 cup Ball® Italian-Style Pasta Sauce Mix - MIX WELL BEFORE MEASURING
2 Ball® Pint (16 oz) Fresh Preserving Jars with lids and bands

Directions:

Prepare Pasta Sauce
1. WASH tomatoes. Peel skins, remove cores and puree in food processor until smooth consistency.
2. COMBINE puree and mix in large saucepan. Heat to a boil. Reduce heat and simmer about 30 minutes, or until the consistency of a commercial pasta sauce.
3. ENJOY using 1 of the 3 ways listed below.
    ENJOY NOW! (Refrigerate up to 1 week)

    -OR-
    FREEZE (Up to one year):
    1. COOL to room temperature, about 30 minutes.
    2. LADLE sauce into jars.  Label
    3. FREEZE sauce for up to 1 year.
      -OR-
      FRESH PRESERVE (Store up to one year):
      1. PREPARE canner, jars, lids, and bands according to manufacturer’s instructions.
      2. LADLE hot sauce into hot jars leaving ½ inch headspace.  Remove air bubbles.  Wipe rims.  Center lids on jars.  Apply bands and adjust to fingertip tight.
      3. PROCESS in boiling water canner for 65 minutes, adjusting for altitude.*
        RECIPE VARIATION: For Basil-Garlic Pasta Sauce, add 1Tbsp finely minced, fresh basil and 2 cloves garlic, minced to saucepan before cooking.
        QUICK TIP: To peel tomatoes, make an “X” on the bottom of tomatoes using a knife.  Plunge in boiling water for 30 to 60 seconds, or until skins start to crack.  Dip into cold water and slip off skins.
        *Increase processing time: 5 minutes for 1,001 to 3, 000 ft; 10 minutes for 3,001 to 6,000 ft; 15 minutes for 6,001 to 8,000 ft; 20 minutes for 8,001 to 10,000 ft.

        Wednesday, September 26, 2012

        Ball Italian Sauce PLUS something extra


        This is some pretty good sauce, I will worn you though it has a kick to it. I made it and poured it all over the spaghetti one night not thinking of course. Yea my poor little ones had there mouths wide open and tongues hanging out. Water! Water! I felt horrible, made them something else and continued with dinner. But I do recommend making if you like it with a kick or would like to try something different.


        You will need:

        8 cups fresh plum tomato purée
        2/3 cup finely chopped onion
        2/3 cup finely chopped celery
        1/2 cup finely chopped carrot
        2 cloves garlic, finely chopped
        4 tbsp bottled lemon juice
        2 tsp salt
        1/2 tsp freshly ground black pepper
        1/2 tsp hot pepper flakes
        3 (16 oz) pint glass preserving jars with lids and bands

        Directions:

        1.) PREPARE boiling water canner. Heat jars and lids in simmering water until ready for use. Do not boil. Set bands aside.
        2.) COMBINE 1 cup of tomato purée, onion, celery, carrot and garlic in a large stainless steel saucepan, Bring to a boil over medium-high heat, stirring frequently. Reduce heat, cover and boil gently until vegetables are tender, about 5 minutes. While maintaining a steady boil, add remaining tomato purée, 1 cup at a time, stirring frequently. Stir in lemon juice, salt, black pepper and hot pepper flakes. Increase heat to high and bring to a full rolling boil; boil hard, stirring frequently, until mixture is reduced by one third, about 15 minutes.
        3.) LADLE hot sauce into hot jars leaving 1/2 inch headspace. Remove air bubbles and re-measure headspace. If needed, add more sauce to meet recommended headspace. Wipe rim. Center lid on jar. Apply band and adjust until fit is fingertip tight.
        4.) PROCESS filled jars in a boiling water canner for 35 minutes, adjusting for altitude. Remove jars and cool. Check lids for seal after 24 hours. Lid should not flex up and down when center is pressed.


        Tuesday, August 28, 2012

        Salsa! Kiddo Safe :)


        I can not tell you how much I enjoy canning. It has opened my eyes to how much money you can save, quantity and doing the math and just realizing how much you get for sooo little. Its been a fun experience to do with my daughters. The taste is amazing and your not eating all those little extras that the companies put into the food you buy. This recipe all by its self is great for those little mouths that love chips and salsa. If you want something a little hotter or mild, you can add whatever you like to this. This recipe is also on the sweet side, even though there is no sugar added to this. All in all my favorite salsa and will be making many variations of this.


        *********WARNING**********

        If for whatever reason and your like me and you want to save your seeds from your peppers. So you can grow your own pepper plants next year......Copied from facebook post.......


        Salsa Recipe:

        7 pounds of ripe tomatoes peeled if desired
        3 cups seeded and chopped fresh Anaheim or poblano chili pepper ( I used Anaheim)
        1/3 cup seeded and chopped fresh jalapeno chili peppers ( 3 large )
        2 cups chopped onion ( 2 large )
        1/2 cup snipped fresh cilantro
        1 cup vinegar
        1/2 can of 6 ounce tomato paste ( I used the whole can)
        5 cloves garlic, minced
        1 tsp salt
        1 tsp black pepper

        Seed , core, and coarsely chop tomatoes ( you should have about 14 cups, I didn't seed or core mine I threw it all in a blender and got it to the consistently that I liked ) Place tomatoes in a large colander. Let drain for 30 minutes.
        Place drained tomatoes in a large stainless steel sauce pan. Bringing to boiling, reduce heat. Simmer, uncovered about 1 and 1/4 hours or until thickened, stirring frequently. Add chili peppers, onions, cilantro, vinegar, tomato paste, garlic, salt, and black pepper. Return to boiling. reduce heat. Simmer uncovered for 10 minutes. Remove from heat.
        Ladle hot salsa into hot canning jars. Leaving a 1/2 inch headspace. wipe jar rims, adjust lids. Process in a boiling water canner for 15 minutes. Start timer when water comes to boil again. Remove jars cool on racks and make sure they sealed. Enjoy!

        Sweet Pickle Relish


        Don't have much to say except Taste Amazing! Super easy to make, a little time consuming but worth it~!


        Sweet Pickle Relish Recipe:

        6 cups chopped cucumber ( I used my blender)
        3 cups chopped green and/or red sweet pepper ( I used my blender)
        3 cups chopped onion (Used my blender again a lot quicker process then chopping)
        3 cups sugar
        2 cups cider vinegar
        1 Tbsp celery, and mustard seeds
        1/2 tsp ground turmeric

        Combine vegetables in an extra large bowl. Sprinkle with pickling salt, add enough cold water to cover. Let stand at room temperature for 2 hours.
        Pour vegetable mixture in colander set in sink. Rinse with fresh water and drain well.
        In a 6-8 quart sauce pan combine sugar, vinegar, celery seed, mustard seed, and turmeric. Heat to boiling. Add drained vegetable mixture, return to boiling. Cook uncovered, over medium high heat for 10 minutes. Stirring occasionally.
        Ladle relish into hot sterilized canning jars. Leaving a 1/2 inch headspace. Wipe the jar rims, adjust lids. Process filled jars in a boiling water canner for 10 minutes. Start timer when water returns to a boil. Remove jars let cool and check for good seal. Enjoy!

        Jelly Jam Time!

        SO I have had a break with the garden things are growing and I was really wanting to do something! So I tried my hand in Jelly and Jam today. Really excited that it was sooo easy, was really quick to make. All in all I will be doing this more and getting crazy with flavors. :)

        So I make what they call mixed juice jelly. OMGOSH I'm in love my fav. I had it done and processed in like 30-45 minutes. Super easy and quick. I would have taken pictures but things were moving and getting done so fast there was no time.
        So here is the finished product.

        Jam I like to call this one 2.1 I know a little weird but its all I had. It called for a cup of each berries that you wanted to use. But I had more blueberries than the others so, it was like a 2 to 1 ratio hints the name 2.1 lol. This is the favorite of the kids and the Mr. They darn near finished a jar at dinner time. Makes me happy and smile goofy that they enjoy what I make so much. Makes me want to continue to do it. Not to mention the money we will save. Will definitely be putting more things in the garden next year. We were testing the waters this year. It has gone way to well and there is expansion plans in the making. :)

        With both recipes I will be including in this post you can really do whatever you would like. All one berry or juice or what not combine two, three, four. Possibilities are endless. Today I will be making just grape, apple. I think I might do a apple grape and I have a raspberry apple juice I think. It could be tasty. We sure will find out. I also know this sounds like a lot of jelly to have but great for gifts and we like our jelly :)


        Here's the jam! I hope you enjoys these as much as my family.

        Juice Jelly Recipe:

        4 cups juice ( not low calorie) mix and match juices for different taste
        1/4 cup lemon juice
        1 1.75 ounce package regular powered fruit pectin. ( I used http://www.freshpreservingstore.com/ball-realfruit-classic-pectin-4-7-oz/shop/382653/ , only because its way cheaper to buy this than one package of pectin.)
        4 1/2 cups sugar

        Poured desired juice and lemon juice into a 6 - 8 quart sauce pan. Sprinkle with pectin. Let stand for a minute or two, stir to dissolve. Bring to a full rolling boil over medium-high heat, stirring frequently. Stir in sugar. Return to a full rolling boil, stir often. Boil hard 1 minute, stirring constantly. Remove from heat, quickly skim off foam with metal spoon if any.

        Ladle into hot, sterilized canning jars. Leaving a 1/4 inch headspace. Wipe jar rims and adjust lids. Process in a boiling water canner for 5 minutes. Start timer when water returns to a boil. Remove jars, cool on racks until set. Make sure they seal.


        Jam Recipe:

        4 cups crushed berries ( I tossed them in my blender, speed the breaking down process up a little. ) Mix and match your favorites. *I used 2 cups blueberries, 1 cup raspberries, and 1 cup black raspberries.
        4 1/2 Tbsp Real Fruit Classic Pectin ( can be found here http://www.freshpreservingstore.com/ball-realfruit-classic-pectin-4-7-oz/shop/382653/)
        3 cups sugar
        6 quilted Crystal Jelly jars. ( I may have added a bit more berries, and I always heat up extra jars just in case I'm off a little.) Jar can be found here: http://www.freshpreservingstore.com/ball-half-pint-8-oz-quilted-crystal-jelly-jars-set-of-12/shop/237410/


        Combined berries in saucepan. Gradually stir in pectin. Bring mixture to a full rolling boil, that can not be stirred down. Over high heat stirring constantly, add entire measure of sugar. stirring to dissolve. Return mixture to a full rolling boil. Boil hard 1 minute, stirring constantly. Remove from heat skim any foam if necessary off top. Ladle into to jars leave 1/4 inch from top.

        Process for 10-30 minutes. Remove lid let stand in water for 5 minutes. Remove from water and let cool on rack for 24 hours. make sure they sealed and enjoy.

        Saturday, August 25, 2012

        Tangy Relish

        I am a big lover of relish, though I haven't gotten to try this one yet. I will be soon maybe tonight Ill make up some hot dogs and have a cookout. Yeah that sounds amazing! So it was a little bit of a process but really not that bad. I used my blender for the majority of all the cutting. depending on how fine or chunky you would like it is up to you and how much you want to blend it. I have small children so I like mine finely cut.


        Other than that I gathered up my materials and got to cooking.


        Everything combined and resting for the hour.

        Fast forward.......walla relish!


        But here it is for you from me :)

        3lbs cucumbers
        2-3 sweet onions
        1/4 cups pickling salt ( if your like me and you cant find it in town any were go to http://www.freshpreservingstore.com/ball-pickling-salt-in-pouch-32-oz/shop/382695/
        3 cups white vinegar
        3/4 cups sugar
        4-5 garlic cloves minced, I use a hand cheese grater makes quick work of it.
        2 tsp dill seeds, mustard seeds, and celery seeds
        1/2 tsp turmeric
        2 Tbsp corn starch

        Finely chop cucumbers and onions. Place in large bowl and sprinkle with salt. Stir well. Let stand for 1 hour. Drain mixture in colander, rinse under cold water, and drain again. Pressing out any excess water/ moisture. In a large pot bring vinegar, sugar, garlic, dill, mustard, and celery seed to a boil. Add cucumber mixture, boil again. Stir frequently. Reduce heat and simmer for 10 minutes. After 9 minutes mix corn starch in with simmering juice mix until thickened. ( I noticed that when I added it I just plopped it in and it was hard to stir in, maybe sprinkle across top or something.) Remove from heat and add turmeric and mix well.

        Pour into sterilized jars, leaving 1/2 inch head space. Wipe rim. Seal with lids and rings. Process in boiling water bath for 10 minutes. Remove from water and let sit for 24 to make sure they seal properly.

        Enjoy!

        Wednesday, July 25, 2012

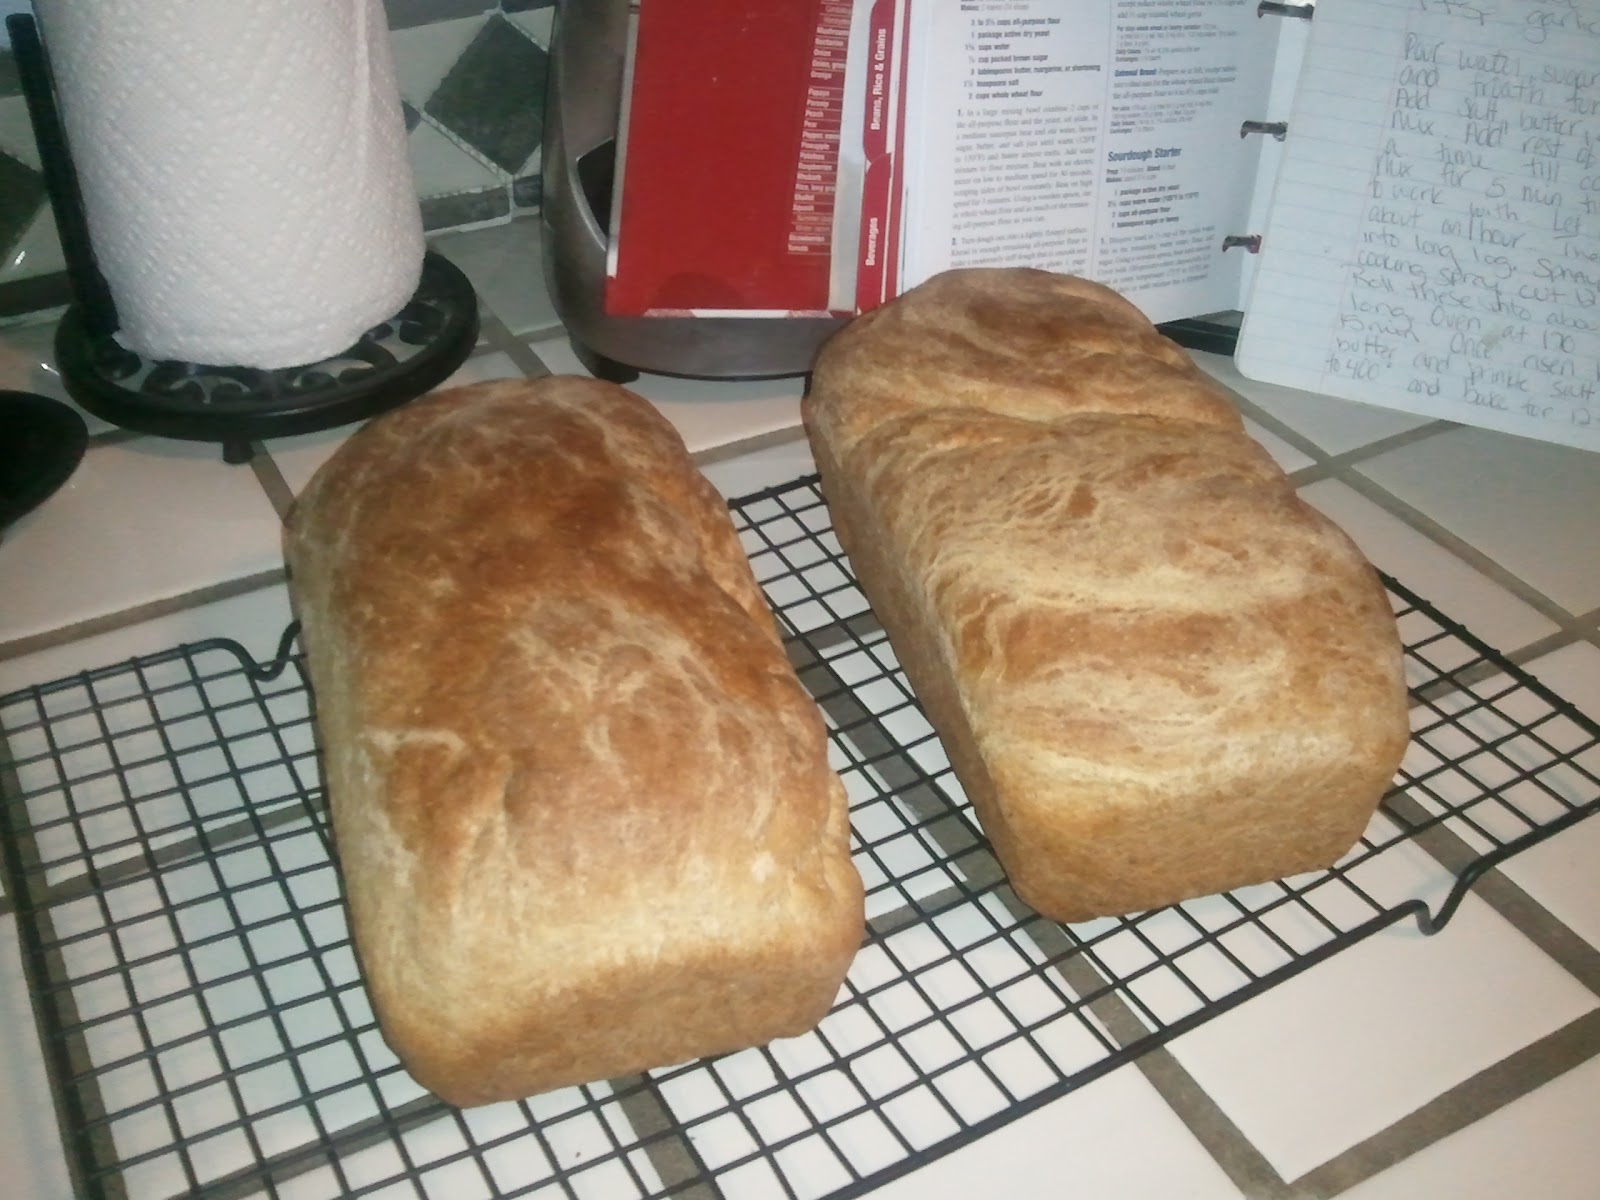
        Scratch Whole Wheat Bread

        I have had this whole new window open up for my 2012 year. I am taking full advantage of everything and everyday. I have made some BIG life changes and I hope that my daughters our taking note. I mean they are taking a BIG interest and wanting to help me so, I think were doing good. The other day I was flipping threw my cookbook wanting to make something. I decided that we go through sooo much bread I wonder how hard it would be to make it. Lucky me I had a lot of what was needed all ready on hand. I don't know if its just me, but I sometimes go threw the store and grab random baking things....... like the other month whole wheat flour. Came in handy so perfect!

        So I can say that the process was really a whole lot easier than I had thought. I really enjoyed it too. The Mr. even chose it over the store bread so that made me feel good. I think I will be making more every week. :)
        
        The supplies

        I'm guessing my looking through my album I must have some reason for not having any in between photos, lol. So I leave you with this:


        TaDa!!! The amazing Whole Wheat Bread.

        
        It was super delicious and yummy. Im giving recipe props to Better Homes & Garden the New Cook Book, :) Enjoy!