 | ||
So here is everything you need minus the pasta noodles that was for dinner. :)
 Added salt, butter and 2 cups flour and cup at a time after combined with first 2 cups.   Cut that log into about 12-14 little logs and roll them out into little perfect logs.  
The finished product. One is missing a bite, because my girls just couldn't wait!
Recipe
Dough:
1 1/2 cups warm water 2 Tbsp sugar 1 Tbsp yeast 1 Tbsp salt
2 Tbsp butter, softened
4-5 Cups flour Topping: 3 Tbsp butter melted Sea salt 1 tsp garlic powder For the dough, pour water, sugar and yeast in bowl and let sit and froth for about 10 minutes. Add salt, butter, and 2 cups of flour. Mix the dough . Add the rest of the flour a cup at a time, until dough scrapes the sides of the bowl clean. Mix the dough about 5 minutes until its soft and easy to work with. Let the dough rest in the bowl until doubled in size, about 1 hour I place a towel over my bowl and set in the oven. Nice warm draft free place. Roll the dough out into a long log, spray a knife with cooking spray and cut the dough into 12-14 pieces. Roll those pieces into about 6 inch long logs. Spray 2 large cookie sheets with cooking spray and lay the bread sticks out leaving about 2 inches between each one. Place them in the oven with the temperature turned to 170 degrees. Let them rise for about 15 minutes, or until doubled in size. Once risen, brush them with the 1 1/2 T of melted butter and sprinkle them with salt. Now preheat the oven to 400 degrees and bake them for 12-14 minutes or until golden brown. While they are baking combine the rest of the melted butter with 1 tsp garlic powder. When the bread sticks are golden brown, remove them from the oven and brush them with the butter/garlic mixture. |
Tuesday, July 31, 2012
Olive garden Bread sticks?!?!? Yes Please
I found a recipe for making what pretty much taste like Olive Garden bread sticks. I love them, who doesn't? So I gathered up the cooking supplies and set forth on my mission to see if we would include this recipe into our life. It passed with flying colors! Yippie Skippie.

Wednesday, July 25, 2012
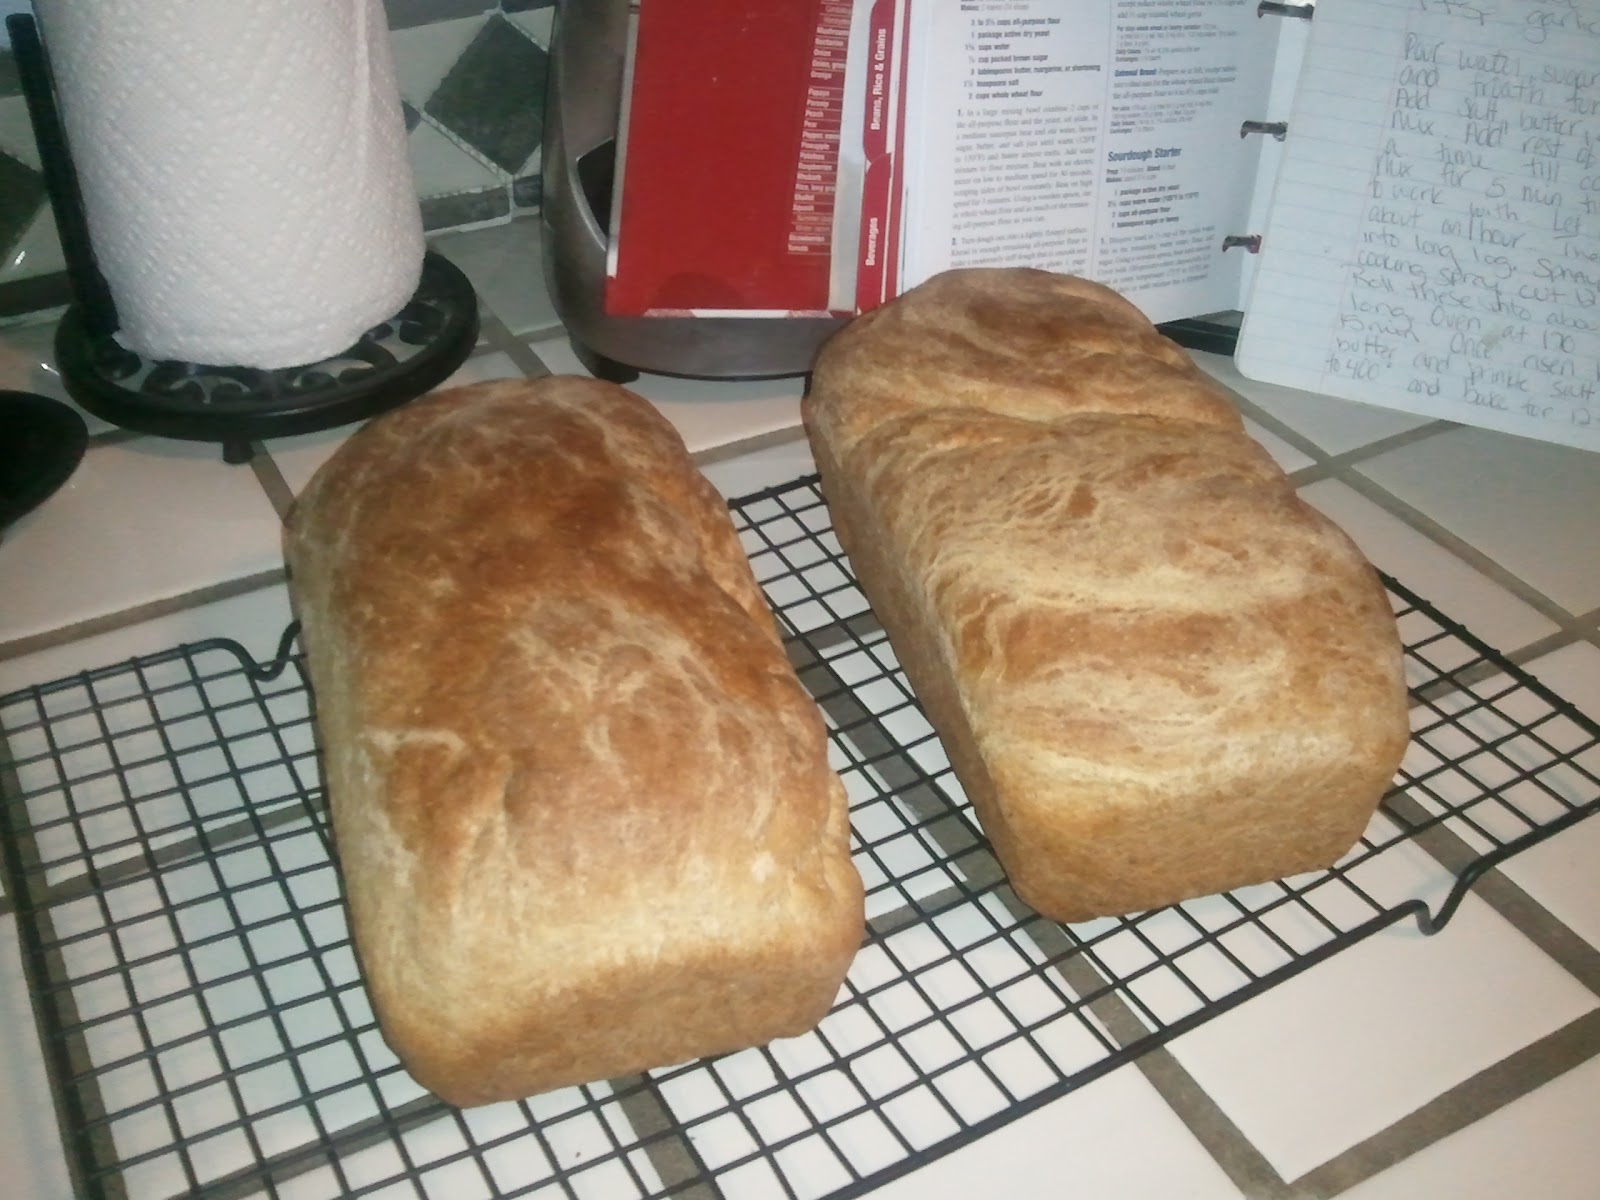
Scratch Whole Wheat Bread
I have had this whole new window open up for my 2012 year. I am taking full advantage of everything and everyday. I have made some BIG life changes and I hope that my daughters our taking note. I mean they are taking a BIG interest and wanting to help me so, I think were doing good. The other day I was flipping threw my cookbook wanting to make something. I decided that we go through sooo much bread I wonder how hard it would be to make it. Lucky me I had a lot of what was needed all ready on hand. I don't know if its just me, but I sometimes go threw the store and grab random baking things....... like the other month whole wheat flour. Came in handy so perfect!
So I can say that the process was really a whole lot easier than I had thought. I really enjoyed it too. The Mr. even chose it over the store bread so that made me feel good. I think I will be making more every week. :)
So I can say that the process was really a whole lot easier than I had thought. I really enjoyed it too. The Mr. even chose it over the store bread so that made me feel good. I think I will be making more every week. :)
 | ||
| The supplies
I'm guessing my looking through my album I must have some reason for not having any in between photos, lol. So I leave you with this:
|
It was super delicious and yummy. Im giving recipe props to Better Homes & Garden the New Cook Book, :) Enjoy!
Friday, July 20, 2012
Pail Pickles
I wrote a letter, YES a letter to my grandma in Minnesota. Asking her for her favorite canning recipes. She sent me some and I got to try the pail pickle one the other days. Since I was waiting for my canning/pickling salt to come and my bread and butter mix. I figured this one didn't need anything fancy. So I gave it a whirl!

It takes them a bit to start tasting like pickles. Though every time I open it up and give it a stir, they taste better and better. Yummy!

Thursday, July 19, 2012
Homemade Bread and Butter Pickles :)
I have been collecting my cucumbers and waiting to have enough to make pickles. Well lets just say most of the time I was on a hunt for canning/pickling salt. Super hard to find in my area. Found some on Morton.com though they wanted almost $18 to ship it to my side of the word. I then found it on Freshperservingstore.com I received a 32 oz bag for I think around $4-5 and couple dollars to ship. Much more in my price range. Not to mention if I had paid the $18 those better have been some darn great pickles!
So anyways I went out to my garden this morning before the rain came in and gathered up another handful of cucumbers so I could get started.


I didn't get the next feel pictures very well. I was to involved in what was going on that I couldn't / they just didn't come out So I just didnt post pictures. So I combined everything BUT the cucumbers into a pot on the stove and began to combined it all and bring to a boil. When that was ready I then packed my jars that i had taken out of the water of course :). Filled them till I was out of cucumbers and then filled with the hot liquid to the imaginary line or just about 1 in to 1/2 inch from the top. It depends on what recipe you read.
SO then into the water bath they went and were processed for about 20-25 minutes according to my elevation. I pulled them out after the time and they immediately began to POP! It was like music to my ears. You should still let them sit for 24 hours and double check to make sure they sealed. Which you do my seeing if it makes a Dinka dink sound if no sound you are GOLDEN! If you have a sould put them in the fridge and start eating them ;) Maybe even wait a week or two and let the flavors and liquid doing it job of turning it into pickles.

So anyways I went out to my garden this morning before the rain came in and gathered up another handful of cucumbers so I could get started.
 |
| This picture is about a week old, things are MUCH bigger/ higher climbing now. :) |
So here it is the process and adventure to my first water bath canning experience :) Enjoy:
I gathered about 14 cucumbers and cut the ends off, then proceeded to cut them about 1/4 in thick. Put them in a stainless steel bowl and then started on the next half. I did also have everything heating up on the stove, canning water, jars, and lids &bands.

Then I had my pickling vinegar, sugar, and bread and butter season mix all ready to go.

I didn't get the next feel pictures very well. I was to involved in what was going on that I couldn't / they just didn't come out So I just didnt post pictures. So I combined everything BUT the cucumbers into a pot on the stove and began to combined it all and bring to a boil. When that was ready I then packed my jars that i had taken out of the water of course :). Filled them till I was out of cucumbers and then filled with the hot liquid to the imaginary line or just about 1 in to 1/2 inch from the top. It depends on what recipe you read.
SO then into the water bath they went and were processed for about 20-25 minutes according to my elevation. I pulled them out after the time and they immediately began to POP! It was like music to my ears. You should still let them sit for 24 hours and double check to make sure they sealed. Which you do my seeing if it makes a Dinka dink sound if no sound you are GOLDEN! If you have a sould put them in the fridge and start eating them ;) Maybe even wait a week or two and let the flavors and liquid doing it job of turning it into pickles.

I don't quite understand why one of my bands turn a different color.???? They were all the same when they went in, so I don't know. I cant wait to try them in a couple months. Better to let them sit for a bit and let the process begin. Also It says it will make 2 (32oz) quarts, but I did mine in 4 (16oz) pints. Just so if we go camping or I give some away. Worked out perfect though.
Ball Bread and Butter Recipe:
Makes 2 (32 oz) quarts
For when you want to make just a few jars of Bread & Butter Pickles, use this recipe featuring Ball® Bread & Butter Pickle Mix - Small Batch with Pickle Crisp® Granules for crunchier pickles!
For when you want to make just a few jars of Bread & Butter Pickles, use this recipe featuring Ball® Bread & Butter Pickle Mix - Small Batch with Pickle Crisp® Granules for crunchier pickles!
You will need:
3 1/2 lbs pickling cucumbers (about 14 small to medium)
2 1/2 cups vinegar (5% acidity)
2 1/2 cups sugar
1/4 cup Ball® Bread & Butter Pickle Mix
2 Ball® Quart (32 oz) Fresh Preserving jars with lids and bands
2 1/2 cups vinegar (5% acidity)
2 1/2 cups sugar
1/4 cup Ball® Bread & Butter Pickle Mix
2 Ball® Quart (32 oz) Fresh Preserving jars with lids and bands
Directions:
1. PREPARE canner, jars, and lids according to manufacturer's instructions.
2. CUT ends off cucumbers. Cut into 1/2 inch slices.
3. COMBINE vinegar, sugar, and contents of pouch in a medium saucepan. Heat to a boil.
4. PACK slices into jars. Ladle hot pickling liquid over slices leaving 1/2 inch headspace. Remove air bubbles. Wipe rims. Center lids on jars. Apply bands and adjust to fingertip tight.
5. PROCESS in boiling water canner for 15 minutes, adjusting for altitude*. For best flavor, allow pickles to stand for 4-6 weeks.
*Increase processing time: 5 minutes for 1,001 to 3, 000 ft; 10 minutes for 3,001 to 6,000 ft; 15 minutes for 6,001 to 8,000 ft; 20 minutes for 8,001 to 10,000 ft.
Wednesday, July 18, 2012
Wednesday, July 11, 2012
Chicken Coop What!!! :)
Super excited that I was able to move the girls out there this week! NOW I'm working on there run. It may take a little bit. I have to water the dirt so that I can even think about digging! IT is as hard as a rock. Here is some pictures of the process. Don't judge I'm a mother of 2 not a contractor, I also have limited building experience. Biggest thing to date that I have done 99% on my own. Had a little help from my wonderful sunshine for being my frame holder, while I nailed it together. :)
Enjoy....more to come.
Would you like to see the whole story of our little coop??? Check out the story from the beginning
Making room with something old
Demo....for making our chicken coop
Enjoy....more to come.
 |
| The plot that I chose. |
 |
| Peaches checking out the progress. |
 |
| The concrete I used as the floor. |
 |
| Zeta saying good morning. |
 |
| The bones. |
 |
| Starting to look like something. |
 |
| Dalila wanted the coop to be pink. So we did the inside pink. |
 |
| Got the roof up, filled the holes, gave it a rain test. Leak FREE! |
 |
| Getting her first coat of paint. Looks sooo much better. Oh look our baby pumpkins :) |
 |
| Built me a door and hung it! |
 |
| Moved the girls in and gave them a temporary fence. |
 |
| Soo happy! |
Would you like to see the whole story of our little coop??? Check out the story from the beginning
Making room with something old
Demo....for making our chicken coop
Freezing Corn
So before starting our garden I asked all of the older generation to compile there favorite canning, freezing, and jam recipes. Then I kinda took inventory and decided what I was going to plant in our garden. Didn't have lots of room for corn this year. Though next year I am sure we will expand. So I cheated and bought some. If you dont have time for a garden or the room its ok to do these things with food from the store if there an amazing deal! SO why not stock up and save yourself some money this year.
So the other day our local Von's was having a sale on corn. I took FULL advantage. I think I was that crazy "corn lady" that day. They were having a sale 7 ears for $1. So I bought 28 ears for $4. :) lol.
In the end I saved like $22 I'm ok with that. So I found some time husked the corn, cut it off the cob. Then followed my grandmas recipe that she had sent me. She had sent me a canning and a freezing one. I had intentions to try both. Didn't really have the time this week to can though. I opted for the freezing method.
So here it is:
Freezing corn:
- Cut corn off cob raw
- To every 9 cups of corn (28 ears is 18 cups or so)
- 1/2 cup sugar
- 3 1/2 cups water
- 1 tbsp of salt
- Boil 5 minutes. Cool over night. Put in containers or baggies and freeze.
 |
| Finished product. |
NON-stop in this household.....
No time for the computer in the past month!~ I have been demoing a building so I can make a chicken coop ( glad that is finally done for the most part) now just doing finishing touches and adding decor. I know its a coop, but I want it to be pretty :)
Tending the garden getting food from it. Though I had a mishap and wont be receiving any green beans they didn't make it. :( Have gotten lots of peas, starting to get cucumbers and tomatoes now, and also had some tasty butter leaf lettuce ( its sweet, different but good)
But now I think I can take a moment and update my blog. Starting today, i hope. You never know I'm keeping my life busy.:)
Subscribe to:
Posts (Atom)